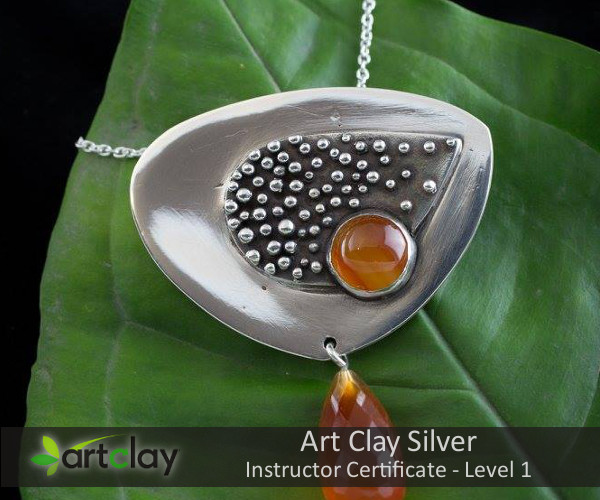
Art Clay Silver - Instructor Certificate - Level 1


Days Times & Studios
Timetable for All Metal Clay Jewellery Courses & Workshops
| Studio | Day | Start Date | No of Weeks | Start Time | End Time | Tutor | Price | Notes |
| Hornsby | Tuesday | 15 Oct 2024 | 4 | 6:00 pm | 9:00 pm | Julie Read | $290 | Silver Clay Jewellery - 4 Week Course |
| Hornsby | Wednesday | 16 Oct 2024 | 4 | 12:30 pm | 4:30 pm | Jules Read | $390 | Creative Jewellery Making 4 hrs x 4 wks |
About this course
Art ClayTM Silver is a revolutionary product that dramatically reduces the time and cost to create unique silver jewellery compared to traditional methods. It has made the creation of fine silver jewellery accessable to artists throughout the world.
If you are interested in creating silver jewellery using precious metal clays this hands on course is ideal starting point. You will learn skills to enable you to work at a semi-professional or professional level.to create your own silver jewellery or teach others how to use Art Clay Silver.
This training is suitable for;
- Jewellers - to learn how to use new materials and methods to supplement their skills
- Artists - to explore different media
- Craftspeople - to create or combine with other techniques
- Fingerprinting and memorial jewellery business operators
- Students in Visual Arts courses
- Individuals - to establish or grow a small or home business
Your silver jewellery will be created from the following projects ....


Level 1 Certification can be completed over either
- a 4 day workshop or
- a series of weekly classes, (expect to take between 8 to12 3 hour classes)
All materials extra.
In successfully completing this training you will ...
- Develop a comprehensive range of foundation skills for creating jewellery with metal clay products.
- Create 6 pieces of unique silver jewellery
- Build confidence to teach other people how to use art clay
- Qualify for wholesale pricing on most Art Clay Silver TM products
- Receive manufacturer supported Certification as a Level 1 Instructor in Art Clay Silver
- Be listed as an Art Clay Silver Instructor on the Art Clay World Australia website artclayworld.com.au.
Art Clay Certification
This course follows the certification criteria set by the manufacturers of Art Clay Silver (Aida Chemical Industries).
It is recognised worldwide by Art Clay distributors.
At the completion of the workshop or course you will:
- receive certification as a Level 1 Instructor for Art Clay Silver
- be eligible for a 10% wholesale discount on most Art Clay Silver products
- be listed as an Instructor on the Art Clay World Australia website.
- complete performance criteria against Unit of Competency CUAJWL201 Develop Jewellery Making Skills which may be used as an elective unit in the qualifications of Certificate II or III in Visual Arts.
National Qualifications Framework Information
This workshop also covers a subset of elements and performance criteria for the following Units of Competency:
CUAJWL201 Develop Jewellery Making Skills
CUAJWL301 Produce Jewellery
CUAJWL401 Experiment with techniques to produce jewellery
These are elective units within Nationally Recognised Qualifications at Certificate and Diploma levels in Visual Arts.
Art Clay Silver - Instructor Level 1 Program >
In this program you will create 6 pieces of silver jewellery based on the types shown below.
These pieces will develop comprehensive foundation skills in working with Art Clay Silver.
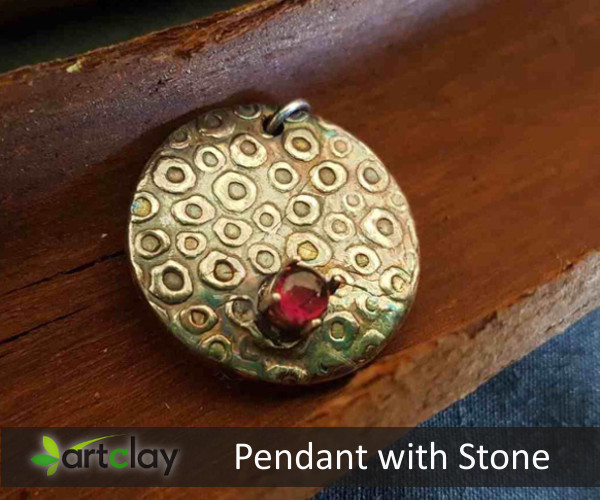
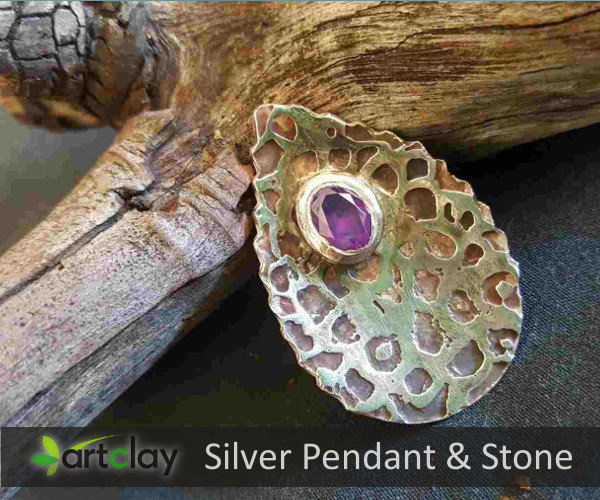
1. Pendant with Stone

Basic techniques for using Art Clay Silver Clay Type
1) Making a clay pendant
2) How to store left-over or unused clay
3) How to reconstitute dried clay to its original condition
4) Understanding the shrinkage of clay
Stone setting
6) How to attach a silver bezel
7) How to set a stone into the silver bezel securely
8) Understanding the tips for stone setting
Using a file
9) Understanding the basic way of filing
10) How to shape and smooth the ring surface using a file
Basic techniques for finishing Art Clay pieces
11) Fixing any deformations after firing by tapping on the metal mandrel
12) Polishing with a stainless steel brush
13) Understanding the use of the metal burnisher
14) Finishing the ring surface with the metal burnisher
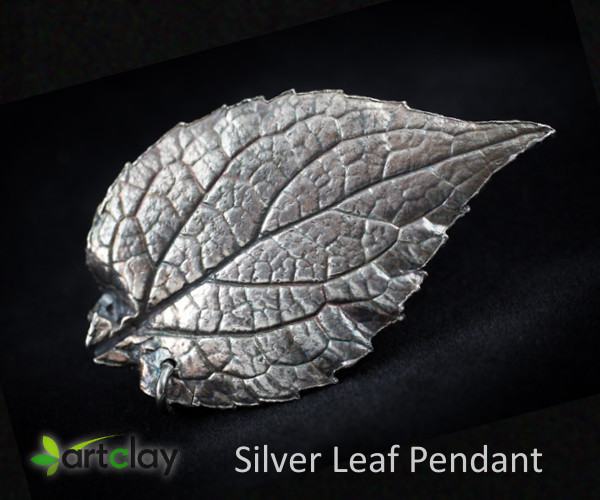
2. Leaf Pendant

Basic techniques using Art Clay Silver Paste Type
1) Thinning the Paste Type for application on the leaf Transferring natural texture (cf. leaf veins)
2) How to choose a good leaf for the project
3) Thickness of the layers (about 1mm thickness)
Finishing the textured piece
4) Polishing with a stainless steel brush
5) Understanding how to burnish and not lose the leaf vein texture
Attaching the findings
6) Drilling a hole with a pin vise
7) How to open and close the jump rings using pliers and attach to the piece
8) Putting a chain through the jump ring
3. Textured Pendant

Basic techniques for using Art Clay Silver Syringe Type
1) Using the Syringe to follow a pattern
2) Proper way of cleaning syringe nozzles and how to store Syringe Type Molding with Syringe Type
3) Building layers of syringe line Reinforcing the piece with Paste Type
4) Using Paste type to reinforce the fragile parts of the syringe line
Stone-setting using Syringe Type
5) Covering the girdle of the stone with Syringe type
6) Keeping the stone table clean and free of clay Finishing on the syringe lines
7) Burnishing carefully, not pressing too hard and losing the syringe lines Attaching findings
8) Putting a chain through the oval (or round) jump ring
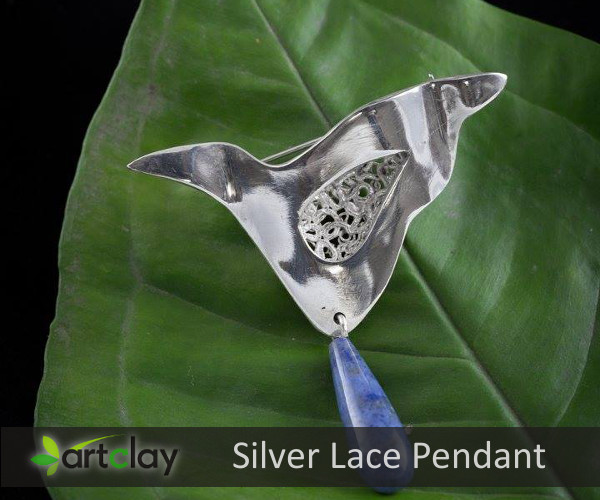
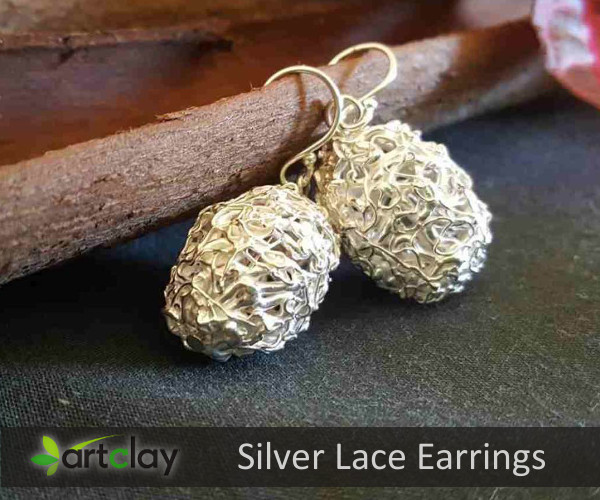
4. Lace Heart Earrings

Preparing the core with cork clay
1) Using the cork core after complete drying
2) Smoothing the surface of the core cork by filing Setting a flat screw eye (small)
3) Attaching the flat screw eye (small) securely to the piece
4) Understanding the tips for attaching screw eye
Making a hollow piece with Syringe Type
5) Drawing fine and delicate lines with Syringe type
6) Making the piece in the appropriate strength
7) Understanding how to make a hollow piece using the cork core Firing method
8) Using a soft fiber cloth for support to prevent deforming during firing
Finishing
9) Not adding too much pressure while burnishing and causing the shape to be deformed
Attaching findings for earrings and pierced earrings
10) Attaching the oval jump rings and earring findings to the pieces
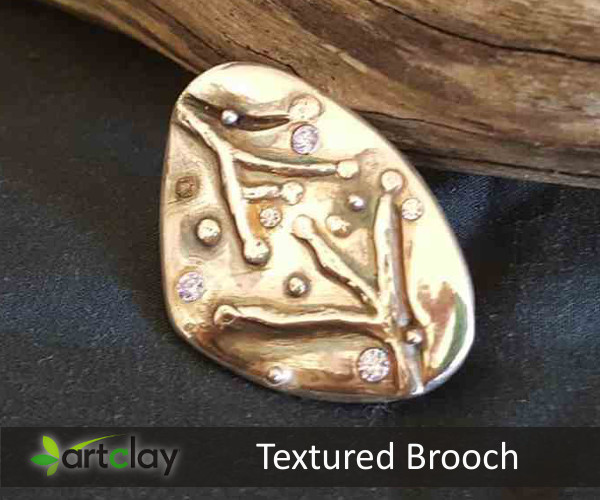
5. Pendant or Brooch with Stone
Molding the shape with Clay Type
1) Being able to control and shape the clay without cracking Using the original stone setting (Silver Bezel)
2) How to attach the silver bezel
3) How to set the stone into the silver bezel securely Drawing technique with Paste type
4) Mixing Paste type with water to make the proper thickness for drawing
5) Expressing the drawing design to match the overall design Attaching the screw type brooch findings
6) Understanding the method to attach the brooch findings
7) Being able to adjust the pin length by cutting and making a new needle point Using wet & dry sandpaper (or sponge sanding pad) to make a mirror-like finish
8) How to make the mirror-like finish with sandpaper (sponge sanding pad) and metal polish 9) Using the metal burnisher to finish tight and narrow areas
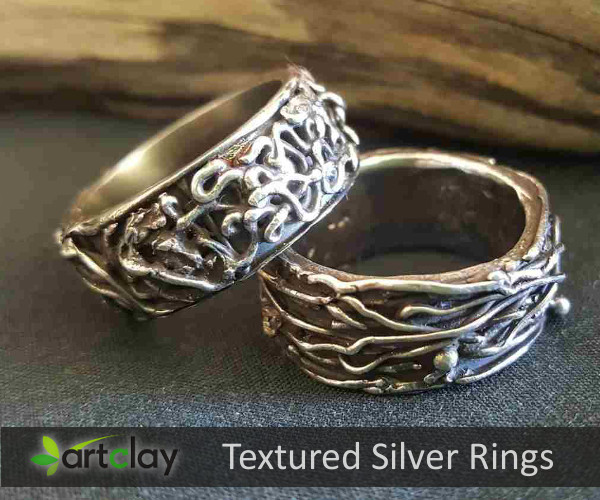
6. Textured Silver Ring

Making a flat band ring
1) Rolling out clay in even thickness without cracking
2) Using the Paste type to join the band ends
3) Understanding the contraction size of the flat band ring
4) Understanding the tips for ring making and handling for dried piece
Decorating with Syringe type
4) Ability to extrude the syringe lines with a stable stroke Controlling the file
5) Using the file to smooth the ring surface
6) Smoothing the ring hole rim so that it will be comfortable to wear Finishing
7) Burnishing carefully, not pressing too hard and losing the syringe lines
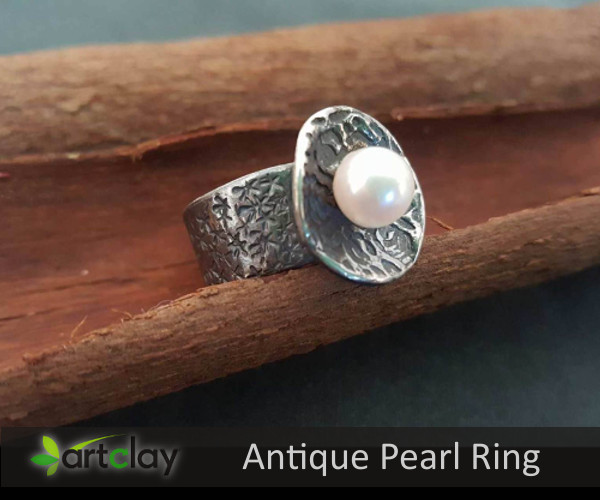
7. Antique Pearl Ring

Basic techniques using Slow Dry type
1) Understanding the characteristics of Slow Dry type clay
2) Understanding the usage of the empty syringe for Slow Dry type Modeling with Slow Dry Type and syringe
3) Extruding an unique syringe line from the cut-designed nozzle tip
4) Understanding the contraction size of the ring Using the pure silver wire
5) Setting the pure silver wire securely Finishing
6) Burnishing carefully so as not to lose the syringe design
Attaching a pearl
7)Attaching the pearl at the last stage
8) Adjusting the length of the pure silver wire to the pearl hole depth
9) Using an adhesive glue to set the pearl securely